Amazon RDS Custom for SQL Server – A new beginning


Imagine getting SA (sysadmin) access to your RDS SQL Server Instance! Well, that was not possible in the past, but during AWS re:Invent 2021, Amazon RDS Custom for SQL Server was announced and that changes the game and it’s a new beginning. With RDS SQL Server, AWS manages the hardware and routine tasks like OS installation, OS patching, DB patching, HA, scaling etc. and helps you focus on DB and App optimization. These routine tasks are what’s called undifferentiated heavy lifting and they often don’t add value to your business. By offloading these tasks to AWS, you are getting a chance to utilize your time to focus on things that matters to your business. Like optimize the queries, work closely with developers to understand their goals, model the data and help them chose the right purpose build engine etc. This is the value add for RDS SQL Server.

RDS SQL Server was innovating at a rapid fashion and a lot of features were added recently (like SSIS, SSRS, SSAS etc.) to close the gap and offer a near close experience of running SQL Server on EC2 or in on premises, however there were still gaps. As a user, you never had access to the host operating system, you didn’t have SA access to the instance, you couldn’t run CLR and anything that needs elevated privileges was a no go. This is what is changing with RDS Custom for SQL Server. With RDS Custom, there is a notion of shared responsibility that’s in play now. You are now allowed to make custom changes to the database, get access to the host etc. and do things that was never possible before.

Support Perimeter is a new concept within RDS custom and it monitors and alerts invalid configurations based on your custom changes. The focus for the support perimeter is around the infrastructure, operating system and the database. If your changes are within the allowed perimeter, you are good. The need for support perimeter is to ensure that your changes won’t break RDS automation. RDS Custom still offers you the ability to resume automation and RDS will monitor, backup and manage the instance for you as usual.

Let’s take a quick look at spinning up RDS Custom for SQL Server –

Walkthrough

First things first, there are some prerequisites that needs to be set before you create a RDS Custom for SQL Server instance. They are:

IAM instance profile

KMS key

VPC endpoints

Instance profile role will allow RDS custom instance to talk to many other AWS services like S3, CloudWatch Logs, KMS, Secretes Manager, SSM etc. These privileges are needed for ongoing automation. Below is a quick snapshot of the policy summary:

By default, RDS Custom instances are required to have encryption at rest (Yes, security is job zero!) and the KMS key will be required to launch an RDS Custom instance.

VPC endpoints will facilitate outbound connections to services like S3, SSM, CloudWatch etc. when an RDS Custom instance is created as Private. Below is a quick snapshot of all the required VPC endpoints:

To help ease out the creation of all these perquisites, you can leverage the CloudFormation Template which is available in the documentation.

Once the prerequisites are taken care, you can head to the RDS console to create a database instance. Under the create database section, select standard create, select SQL Server and select Amazon RDS Custom.

You can select the usual settings like edition, version, instance identifier, master username/password, instance class, storage, VPC, subnet group, public access(yes/no), VPC security group, AZ, database port etc. The new changes are around RDS custom security section where you can select the instance profile that was created in the pre-requisite section and the KMS key. Below is a quick snapshot for ref:

At the time of instance creation, you have to choose full automation and you have the ability to pause the automation after the database instance is created to apply your custom changes. The automation mode determines whether RDS Custom provides monitoring and instance recovery for your instance. If you want to make changes to the host, you can pause RDS Custom automation for a specific period. The pause ensures that your customizations don’t interfere with RDS Custom automation.

Select additional configurations like backup enabled, maintenance window like normal and proceed to create the database.

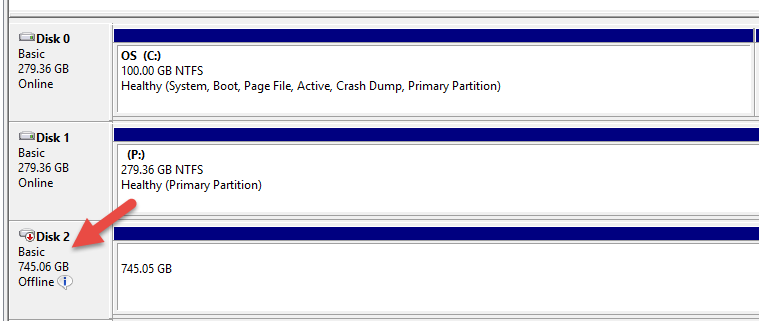
It will take a while for the instance/database to be created, however while the creation process is going on, you can see that a new EC2 instance is created in your account. Below is a quick snapshot for reference:

This is a change in behaviour with RDS Custom for SQL Server. When you create a traditional RDS SQL Server database, the instance will be created in an AWS account which is managed by the RDS team and its abstracted away from you. You will just get an endpoint that you connect to. Having an EC2 instance in your account means, you now can RDP to the box and take custom actions.

The quickest way to connect to the instance is to leverage Sessions Manager. Select the EC2 instance, select Connect and choose Sessions Manager.

And for the very first time, I’m logged into the box that runs RDS SQL Server! Isn’t that cool?

Like I stated at the beginning, the admin user is now SA for the instance:

Conclusion

With RDS Custom for SQL Server, the door is pretty much open and you have a lot of flexibility now to migrate more workloads to a managed platform. Take RDS Custom for SQL Server a quick spin and do let me know your experience around it. I will be testing the HA capabilities, will do some custom changes and will simulate some on- premises HA behaviors soon and will come with a new post to talk about those results.

Keep watching this space for more! #BuildON

SQL Server 2017 in a Docker Container running on a Mac – Tips and Tricks


I started using a MacBook Pro at work, and the very first thing I did was configure SQL Server 2017 running on a docker container, and run it locally within the Mac. In this post I will discuss some tips and tricks which will come handy if you are interested to pursue this route.

Tip 1 : How do I install SQL Server on a Mac?

You can follow the below steps to get started.

sudo docker pull microsoft/mssql-server-linux:2017-latest
  • Docker run
sudo docker run -e 'ACCEPT_EULA=Y' -e 'MSSQL_SA_PASSWORD=<ReallyStrongPassword>' \
 -p 1401:1433 --name containername
 -d microsoft/mssql-server-linux:2017-latest

Tip 2 : How to connect to the SQL instance running on a container via SQL Operations Studio?

Tip 3 : How to view the running containers?

Run docker ps

docker ps

Tip 4 : How to stop the running container?

docker stop <container_id>

Tip 5 : How to view the details of containers which are in stopped state?

docker ps -a

Tip 6 : How to connect to the SQL instance running on a container via command line?

Run the below sqlcmd command –

sqlcmd -S YourIP,Port -U SA -P '<ReallyStrongPassword>'

You can issue regular T-SQL commands after you establish the connection.

Tip 7 : How to persist data ?

If you remove the container, the entire database which you might have configured is lost. To avoid this, you can create a data volume container. Below is the command to create container with a data volume with name sqlvolume –

docker run -e 'ACCEPT_EULA=Y' -e 'MSSQL_SA_PASSWORD=ReallyStrongPassword' -p 1433:1433 --name containername 
-v sqlvolume:/var/opt/mssql -d microsoft/mssql-server-linux:2017-latest

The databases which you create will now be persisted until you delete the volume.

Tip 8 : How to share the data volume container with multiple containers ?

If you stop an existing container which is using the data volume,then you can create another container with the same data volume name and databases which were hosted under the data volume will reflect under the new container.

Conclusion:

The ability to spin up and spin down containers and multiple containers is changing the way I test various versions of SQL Server/Databases and its super flexible when it comes to a CI/CD pipeline.

Thanks for reading, and keep watching this space for more.

SQL Server 2017 running on Windows Containers!


One of the questions which I normally get all the time whenever I talk about SQL Server and Docker is – Why you want to run SQL Server on containers?

Here is what Microsoft has to say:

“Windows Containers are an isolated, resource controlled, and portable operating environment. An application inside a container can run without affecting the rest of the system and vice versa. This isolation makes SQL Server in a Windows Container ideal for Rapid Test Deployment scenarios as well as Continuous Integration Processes.”

Recently I had a chance to invest sometime configuring SQL Server 2017(CTP 2) on Windows Containers, and this post will give you the step by step instructions on how to configure this.

Step 1 –

Choose Windows Server 2016 for running containers.

All my testing was done in AWS, and I picked the below AMI- Microsoft Windows Server 2016 Base with Containers

Step 2 – 

Install Docker. Run the below PS commands –

Install-Module -Name DockerMsftProvider -Repository PSGallery -Force
Install-Package -Name docker -ProviderName DockerMsftProvider
Start-Service Docker

Step 3 – 

Update Windows Patches.

Step 4 – 

Do docker pull to get the Official images for Microsoft SQL Server for Windows Containers.

docker pull microsoft/mssql-server-windows

Step 5 – 

Run the container.

docker run -d -p 1433:1433 -e sa_password=<Your strong SA Password> -e ACCEPT_EULA=Y microsoft/mssql-server-windows

Step 6 – 

Run docker ps and note down the container_ID.

Run docker inspect and note down the IP of the container.

docker inspect --format='{{range .NetworkSettings.Networks}}{{.IPAddress}}{{end}}' <Container_ID>

Step 7 – 

Connect to the SQL Server(Instance) outside the container via SQL Server Management Studio. Use the IP to connect.

*Click on the image below for better resolution.


Conclusion :

That’s pretty much it. Within 7 steps you are running SQL Server 2017 on Windows Containers. Its super lightweight and easy to spin up. Perfect fit for a CI pipeline.

Thanks for reading, and keep watching this space for more(container goodness!).

Google Cloud Spanner – Next big thing in the database world?


Last month Google announced the public beta for Cloud Spanner, and I would like to share few details around this since it’s a big news!

So, what exactly is Cloud Spanner and why it’s a big deal? Here is how Google Summarizes its importance:

“A globally distributed relational database service that lets customers have their cake and eat it too: ACID transactions and SQL semantics, without giving up horizontal scaling and high availability.”

As per Google, Cloud Spanner is a No-Compromise Relational Database Service and it is the first and only relational database service that is both strongly consistent and horizontally scalable. With Cloud Spanner you enjoy all the traditional benefits of a relational database: ACID transactions, relational schemas (and schema changes without downtime), SQL queries, high performance, and high availability. But unlike any other relational database service, Cloud Spanner scales horizontally, to hundreds or thousands of servers, so it can handle the highest of transactional workloads. With automatic scaling, synchronous data replication, and node redundancy, Cloud Spanner delivers up to 99.999% (five 9s) of availability for mission critical applications.

I’m really excited about Cloud Spanner because it’s been used/tested within Google heavily, and they had published a paper about it in 2012.  It’s time to spin this up, and get hands dirty.

If you would like to know more about Cloud Spanner, then please access the below links  –

https://cloud.google.com/spanner/

https://cloudplatform.googleblog.com/2017/02/introducing-Cloud-Spanner-a-global-database-service-for-mission-critical-applications.html

https://static.googleusercontent.com/media/research.google.com/en//archive/spanner-osdi2012.pdf

https://research.google.com/archive/spanner.html

Thanks for reading and keep watching this space for more!

Windows Server 2016 and SQL Server 2016 – A match made in heaven!


For all these years Windows Server 2016 is the Windows version I was waiting for, and this blog post will explain why I’m super excited about this!

With Windows Server 2016, you can now create a Windows Cluster with nodes in multiple domains. Or even without a domain (Workgroup).

With Windows Server 2016 and SQL Server 2016, you can now create an Always On Availability Group configuration with nodes in multiple domain, and this is exactly why I’m super excited as it gives more flexibility when architecting complex/robust systems.

Think about the below scenario (Simplified):

win1

In the above picture, there are 3 separate domains, and before Windows Server 2016 and SQL Server 2016, there was no way to create an Always On Availability Group configuration with these 3 nodes participating.

With Windows Server 2016/SQL Server 2016 it’s possible now to add nodes from different domains to a cluster and configure an AG on top of it:

win2


There are some other nice benefits of Windows Server 2016, and they are:

Seamless Upgrades:

Upgrading to Win Server 2016 is going to be easy and less painful going forward. If you have an existing Win 2012 R2 cluster, then you can opt to do a rolling upgrade. Assume that it’s a 3 node cluster, then you can evict a node and install Win 2016 on it and add it back to the cluster.

If you don’t want to go through the hassle of evicting the node, upgrading and adding it back, then you can also opt for an in-place upgrade of an existing node. Cluster will work in mixed mode.

Cluster Site Awareness:

We can now set policies to allow a SQL instance to failover to a node within the same site before failing over to a node in a different site. More control and more flexibility.

Quarantine nodes:

Let’s assume that in a cluster you have a node which is in a flapping state (not stable and it’s joining in and out frequently). With Win 2016, this node will be Quarantined. Flapping nodes can impact the whole cluster negatively and quarantine will avoid this. The quarantined nodes are not allowed to join the cluster for 2 hours.

Scaling:

Win 2016/SQL 2016 supports 24 TB of memory. Yes! Let’s cache all those databases out there! (No more IO operations).

Win 2016/SQL 2016 supports 640 cores!  <Cough> license per core $ amount! </Cough>

Storage Spaces Direct:

Win 2016 support storage spaces direct and we can now run SQL FCI and AG on storage spaces direct. Storage Spaces Direct is nothing but DAS storage replicated across all nodes.

Conclusion:

If I’m running SQL 2016, then I would definitely want to run it on Win 2016. The features and capabilities are too good to ignore.

Thanks for reading, and please watch this space for more!

When disks have different sector sizes for primary and secondary replica log files in an AlwaysOn Availability Group Config


Recently I was analyzing a stress test result for an AG configuration, and as usual I was reading to SQL error logs to see if there is anything out of normal happened during the stress window.

In one of the asynchronous replicas, I started noticing a series of messages related to log IOs:

disksec1

The keyword misaligned tempted me to check the sector size of the log file involved, and this is where things started interesting.

Log file on the primary:

disksec2

Log file on the secondary:

disksec3

From the above screenshots, you can clearly see that the disks are not aligned.

So, what’s a big deal about this?  When disks for primary and secondary are not aligned, then the AG synchronization process can run slow. This is not something which you would like to see in a Production server.

To ensure that you don’t have slow AG sync process,all the disks involved(specifically log file disks) in an AG configuration should have same sector size(Recommended).

Microsoft did released a hotfix to fix slow synchronization issues with misaligned disks, however I would still prefer setting the disks correctly rather than opting for this hotfix.

You can refer the hotfix details here – https://support.microsoft.com/en-us/kb/3009974

Trace flag 1800 has to be enabled, for this hotfix to work, and it’s applicable for SQL 2016 too.

Conclusion: 

AlwaysOn AG has multiple dependencies(like WSFC, Networks, Storage Subsystem etc) and setting some of the best practices for these dependencies will ensure that your AG is healthy and running at optimum levels.

Thanks for reading, and keep watching this space for more!

AlwaysOn Availability Group Database Level Health Detection – SQL Server 2016


SQL Server 2016 AlwaysOn AG got many improvements, and I’m pretty impressed with the log throughput improvements and redo improvements based on some of my test cases(A detailed blog post on that will follow soon). In this blog post we will look at another key improvement, ie Database Level Health Detection.

SQL Server 2016 enhances the AlwaysOn health diagnostics with database health detection. If AlwaysOn availability group database health detection has been selected for your availability group, and an availability database transitions out of the ONLINE state (sys.databases.state_desc), then entire availability group will failover automatically.

Let’s look at a demo to demonstrate the new behaviour –

I have enabled Database Level Health Detection for my AG as shown below –

AG20161Now, in theory if one of the disks which is hosting my database tpcc is gone(both data/log file), then it should trigger a failover.

Currently node 001 is the primary replica. Let’s see, if theory matches with reality.

I went ahead and inserted data continuously to one of the tables in the database, and took the disk(which hosts both data/log files) offline via Disk Management –

AG20162

That caused the database to go into Recovery Pending State –

AG20163

Note – This controlled failure simulation was not a straightforward process. Initially the database was not going to a degraded state. After my interaction with some of the top SQL Server Experts out there in our community, I was able to force the DB go into a degraded state.

Ref this twitter thread for more details – https://twitter.com/AnupWarrier/status/748364014682578949

This immediately caused a failover, and now 002 is the primary replica.

AG20164

Conclusion – 

This proves that Database level health detection works seamlessly and a failover is triggered when the state of a database changes from Online to other degraded states.

Thanks for reading, and keep watching this space for more!

Why you should think about upgrading to SQL Server 2016!


SQL Server 2005 is out of support and you might be (Or rather, you should be) planning an enterprise wide upgrade of SQL Server. Are you thinking of upgrading to SQL Server 2014? If yes, then wait! SQL Server 2016 is packed with great features and mainly, there is plenty of enhancements. Here is a quick walk-through of my 6 favorite features, and I will explain why SQL Server 2016 is a great choice for your next platform upgrade(When it’s released(RTM)):

1. In Memory OLTP Improvements

As you already know In Memory OLTP, also known as ‘Hekaton’ and ‘In-Memory Optimization’, is Microsoft’s latest in-memory processing technology. In-Memory OLTP is optimized for Online Transaction Processing (OLTP). It is integrated into SQL Server’s Database Engine and can be used in the exact same manner as any other Database Engine component.

In-Memory OLTP originally shipped with SQL Server 2014 and it mainly features two new data structures which are Memory-Optimized Tables, and Natively-Compiled Stored Procedures.

SQL Server 2016 provides an improved In Memory OLTP engine, and it overrides many restrictions which existed in SQL 2014(Phew! I was waiting for this to happen).

In Memory OLTP SQL 2016 Improvements

Feature/Limit SQL Server 2014 SQL Server 2016
Maximum size of durable table 256 GB 2 TB
LOB (varbinary(max), [n]varchar(max)) Not supported Supported
Transparent Data Encryption (TDE) Not supported Supported
ALTER PROCEDURE / sp_recompile Not supported Supported (fully online)
ALTER TABLE Not supported
(DROP / re-CREATE)
Partially supported*
DML triggers Not supported Partially supported
(AFTER, natively compiled)
Feature/Limit SQL Server 2014 SQL Server 2016
Indexes on NULLable columns Not supported Supported
Foreign Keys Not supported Supported
Check/Unique Constraints Not supported Supported
Parallelism Not supported Supported
OUTER JOIN, OR, NOT, UNION [ALL], DISTINCT, EXISTS, IN Not supported Supported
SSMS Table Designer Not supported Supported

The above 2 tables should help you understand why SQL Server 2016 should be the platform of your choice if you are planning to deploy In Memory OLTP for your critical workloads.  I would still say In Memory should be your last resort to fix issues like latch contention or heavy blocking as there are other techniques like Hash partitioning with a computed column(to reduce contention) or use Read Committed Snapshot Isolation (RCSI)(to avoid blocking). There are other overheads associated with these two, and you should evaluate all the available options and pick the right solution.

2. Column Store Indexes

SQL Server 2016 introduces real-time operational analytics, the ability to run both analytics and OLTP workloads on the same database tables at the same time (Yes, to an extend and we are not talking about replacing SSAS cubes).

Benefits of Column Store Indexes

A columnstore index can provide a very high level of data compression, typically 10x, to reduce your data warehouse storage cost significantly. Plus, for analytics they offer an order of magnitude better performance than a btree index. They are the preferred data storage format for data warehousing and analytics workloads. Starting with SQL Server 2016 ,you can use columnstore indexes for real-time analytics on your operational workload.

Recommended use cases:

  • Use a clustered columnstore index to store fact tables and large dimension tables for data warehousing workloads. This improves query performance and data compression by up to 10x.
  • Use a nonclustered columnstore index to perform analysis in real-time on a OLTP workload.

You might have many analytics queries today which you will never run directly against a OLTP database mainly because it might impact the OLTP workload performance, but with Operational Analytics you have an opportunity to test and ensure that those analytics queries can indeed be run against a OLTP database or even consider leveraging Always On AG secondary replicas powered by nonclustered columnstore to offload your analytics workloads .

3. Enhanced AlwaysOn Availability Groups

The AlwaysOn Availability Groups feature is a high-availability and disaster-recovery solution that provides an enterprise-level alternative to database mirroring. Introduced in SQL Server 2012, AlwaysOn Availability Groups maximizes the availability of a set of user databases for an enterprise. An availability group supports a failover environment for a discrete set of user databases, known as availability databases, that fail over together. An availability group supports a set of read-write primary databases and one to eight sets of corresponding secondary databases. Optionally, secondary databases can be made available for read-only access and/or some backup operations.

AlwaysOn AG SQL 2016 Improvements

Failover on database health
Distributed Transaction Coordinator support
3 Synchronous replicas
Optimized log transport
Load balancing across readable secondary replicas

The first enhancement is self-explanatory,now a failover can be triggered according to the state of the database health. That can come handy in some situations.

DTC support is promising. In the past I have worked with some 3rd party apps which relied heavily on DTC and it’s good to see that SQL 2016 is supporting it.

Optimized log transport is my favorite enhancement. Normally on a high concurrent OLTP system, there is always a chance for the secondaries to stay behind and impact the RTO/RPO service level agreements. With optimum log transport and parallel redo threads, this overhead will be reduced.

4. Native JSON Support

SQL Server 2016 natively supports JSON. With native support you have the ability to format and export data as JSON string. You also have the ability to load JSON text in tables, extract values from JSON text, index properties in JSON text stored in columns, etc.

First thing we should be aware is that built-in JSON support is not the same as the native JSON type. In SQL Server 2016, JSON will be represented as NVARCHAR type.

JSON Use cases

  • You can accept JSON, easily parse and store it as relational
  • You can export relational easily as JSON
  • You can correlate relational and non-relational

5. Always Encrypted

Always Encrypted is a feature designed to protect sensitive data, such as credit card numbers or national identification numbers (e.g. U.S. social security numbers), stored in SQL Server databases. Always Encrypted allows clients to encrypt sensitive data inside client applications and never reveal the encryption keys to the Database Engine (SQL Database or SQL Server). As a result, Always Encrypted provides a separation between those who own the data (and can view it) and those who manage the data (but should have no access).

Always Encrypted makes encryption transparent to applications. An Always Encrypted-enabled driver installed on the client computer achieves this by automatically encrypting and decrypting sensitive data in the client application. The driver encrypts the data in sensitive columns before passing the data to the Database Engine, and automatically rewrites queries so that the semantics to the application are preserved. Similarly, the driver transparently decrypts data, stored in encrypted database columns, contained in query results.

Data is vulnerable when it’s in rest and in motion. Features like TDE(Transparent Data Encryption) protects the data which is at rest, but till SQL 2016, there was no way to protect the data when it’s in motion. Attacks like man in the middle attack can compromise the data which is in motion, however with SQL 2016 and Always Encrypted we now have a solution to this problem.

6. Temporal tables

Temporal tables, also named system-versioned tables, allow SQL Server to automatically keep history of the data in the table. Temporal tables were introduced in the ANSI SQL 2011 standard and is now available in SQL Server 2016.

A system-versioned table allows you to query updated and deleted data, while a normal table can only return the current data. For example, if you update a column value from 5 to 10, you can only retrieve the value 10 in a normal table. A temporal table also allows you to retrieve the old value 5. This is accomplished by keeping a history table. This history table stores the old data together with a start and end data to indicate when the record was active.

A classic use case for temporal table is for Audit purposes. With temporal tables you can find out what values a specific entity has had over its entire lifetime.

Another use case is a quick recovery when you or someone deletes a row from a table (Yes, the same old delete without a clause!). With temporal tables, you can retrieve the deleted row details from the history table and insert it back into the main table.

So, you might be curious about this. What is the difference between Temporal tables and CDC (Change Data Capture). Here is the explanation:

CDC is usually useful to keep changes for a short period of time to feed those to external consumers such as an ETL process.Temporal tables can keep historic data for very long periods. Usually used for auditing/legal purposes and time travel queries.

Conclusion:

These 6 features should convince you on why you should consider upgrading to SQL 2016 when it’s released. There are many other exciting features like Polybase, Completely overhauled SSRS etc and we will talk more on that during the upcoming posts.

Thanks for reading and keep watching this space for more!

Curious case of SYS.MESSAGES


A strange error struck me last week, and this post is all about that.

What you normally expect when you run SELECT * FROM sys.messages? The query will return a row for each message_id or language_id of the error messages in the system, for both system-defined and user-defined messages.

Rather than returning the rows, system generated an error for me:

Msg 18058, Level 17, State 0, Line 1
Failed to load format string for error 362, language id 1033. Operating system error: 317(The system cannot find message text for message number 0x%1 in the message file for %2.). Check that the resource file matches SQL Server executable, and resource file in localized directory matches the file under English directory. Also check memory usage.

As always, my first instinct was to check what version of SQL Server I was running. It was SQL 2008 R2 SP3.

Build : Microsoft SQL Server 2008 R2 (SP3) – 10.50.6000.34 (X64)

I knew that there are already some issues which we hit during our SP3 patching, and this specific portion of the error message which said “Check that the resource file matches SQL Server executable, and resource file in localized directory matches the file under English directory” added to my suspicion that SP3 upgrade process might have messed-up some files.

A quick search on the MSDN forum revealed info about file sqlevn70.rll which is available in the installation folder( MSSQL\Binn\Resources\1033\sqlevn70.rll) which might not got updated when SP3 update was done, and this info opened new doors.

Some of the folks had success by replacing this file from a server(same build). I tried the same thing by renaming the old file and copied the new one.

The below picture will highlight the size/date difference for both files :

Capture


After this file changed I tried to run the same query SELECT * FROM sys.messages, and got the same error. I just tried this to see if changes can reflect on the fly or I need to restart the services. A restart was indeed needed and the issue was resolved after the same.

Conclusion:

The same error might be happening for your servers too, and I’m still working with Microsoft to see if there are any additional implications (critical ones) because the installer is not updating the files for some specific cases. I will be updating this post in case I have more info in this regard.

Thanks for reading and keep watching this space for more.

Encrypting AlwaysOn Availability Group Transport- Some thoughts!


Transport security for AlwaysOn Availability Group is an interesting topic, and any day it’s a topic which is debatable.

The transport security involves encryption of packets exchanged between the servers involved, and for AlwaysOn AG the encryption is made possible on the Hadr_endpoint.

By default, its encrypted using AES standard. If you are interested to know more about AES, then please ref here.

Here is the code to create the Hadr_endpoint:

USE [master]
GO

/****** Object: Endpoint [Hadr_endpoint] Script Date: 1/27/2016 3:25:01 PM ******/
CREATE ENDPOINT [Hadr_endpoint] 
 STATE=STARTED
 AS TCP (LISTENER_PORT = 5022, LISTENER_IP = ALL)
 FOR DATA_MIRRORING (ROLE = ALL, AUTHENTICATION = WINDOWS NEGOTIATE
, ENCRYPTION = REQUIRED ALGORITHM AES)
GO

This means that by default the end point will ensure that data is encrypted when its sent over. The end point can only connect to end points which uses encryption.

You also have an option to turn off encryption. Yes, you heard that correct. You have an option to disable encryption by using the ALTER END POINT command.

If you closely observe the ALTER command for end point, there are 3 options:

[ , ENCRYPTION = { DISABLED | {{SUPPORTED | REQUIRED } [ ALGORITHM { RC4 | AES | AES RC4 | RC4 AES } ] } ]

Disabling the end point is where I have some thoughts –

Think about this scenario:

What if you have a very well secured network infrastructure, and there is no way something bad like a sniffing can happen. In that case is there a need for turning on encryption?

Yes, as stated earlier this is a debatable topic and the best answer to this question will be “It depends”.

The best answer for this question is to understand the overhead of AES encryption (AES encryption is usually combined with padding) to the data transfer, and to analyze if there are any potential benefits by disabling it.

There might be some edge cases where in disabling encryption in a controlled fashion yielded benefits.

This definitely is food for thought, and I’m really interested to know your thoughts around this.

Thanks for reading, and keep watching this space for more!